In large enterprise networks, network administrators have a busy schedule maintaining network and monitoring if nodes up and running 24/7.
There are many possible ways in which an enterprise network may be compromised. Like
· Users access various applications, web sites, and also download some applications and install them.
· An external entity may access enterprise network, if it is connected to internet.
It will be a tedious task to monitor illegitimate activities unless an efficient monitoring or analysis tool is provided. In order to curb the irrelevant activities of users, we have introduced Active watch list feature where in all the actions can be monitored and necessary actions can be taken when required.
We can maintain a list of various classes, and generate a list of activities of these entities.
To mention a few features,
· IP Address: An external access request from unknown IP
· Port No: If any external user is trying to connect to your local machine, then blacklisted port numbers can be tracked
· Process: Malicious processes can be monitored like Trojan.exe
· Service: Unknown service is being installed by users, which potentially degrade performance
· IP Address and Port No: In an enterprises network connected to internet, users may access data from outside the enterprise network. All the communication happens via IP addresses. Every request may not be legitimate; a hacker may also try to gain access to the network.
It is often necessary to know who is accessing the network. Is there any black listed IP address trying to access the network? How to audit IPs and publish such list of these IP activities?
Users can create list of IPs based on the security risk list done by some agencies like FBI, Google, etc or the enterprise itself may list certain IPs to monitor. Our application should provide a way to enlist IPs. Items in the IP list can be of any of the following format
1. Wild character representation e.g. 123.234.*.12
2. Range of IP e.g. 123.34.1-234
3. CIDR format e.g. 123.45.78.34/26
4. IP Address e.g. 123.45.67.4
Process: Often users download software’s like Tools, Games, File Downloader which may harm system performance and compromise information. Such processes need to be tracked and alerted if the process is black listed, so that network administrator can take necessary actions.
Processes are executable files and always have ‘.exe’ file extension. Some of these processes may harm performance and compromise information. Enlist any process name is executable (*.exe).
Service: There are numerous services available to download e.g. Desktop search by MS and Google, these processes frequently scan documents and keep them indexed for speedier search of documents. These are legitimate services because publishers are known. Many such services are available for download of which publisher and their purpose is unknown. Such process may harm performance and compromise information. It is necessary to keep audit of known and unknown services installed by user and check if any one of them is black listed.
Able to enlist service names which are alpha numeric text with valid set of special characters.
Users: Periodically companies may monitor certain employees who are suspected of malicious activities. It is necessary to monitor the logs generated having users from the monitored list.
Alpha numeric text with special chars allowed by active directory.
Serial Numbers: Serial numbers are associated with USB devices. USB memory sticks are major source of data theft; most of the enterprises disable USB drives. EventTracker’s USB monitoring feature allows only registered (serial number) USB drives to connect.
1. Log on to EventTracker Enterprise.
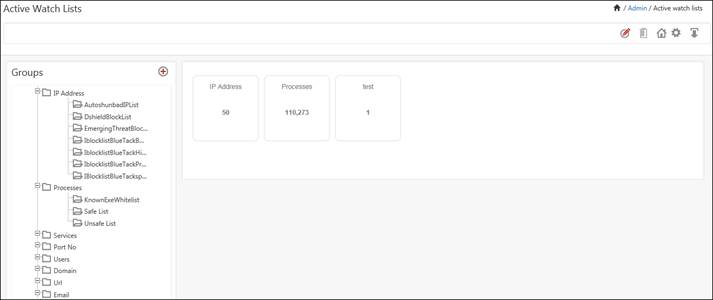
2. Click the Admin menu, and then select Active Watch List.
Active Watch List window displays.
3. To create a list for the respective groups, click ![]() symbol.
symbol.
Group window displays.
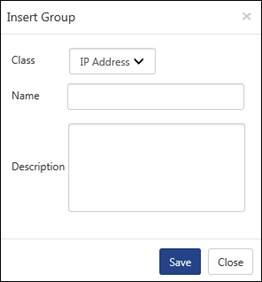
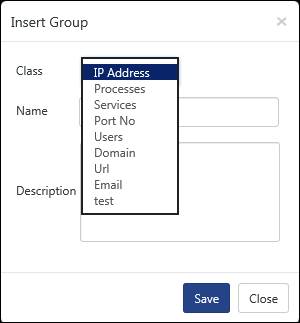
4. To select the respective class, select the CLASS: drop down list.
|
Field |
Description |
|
IP Address |
Create a list of IP Addresses |
|
Processes |
Create a list of processes (executable files) |
|
Services |
Create a list of services |
|
Port no |
Create a list of port numbers |
|
Users |
Create a list of users |
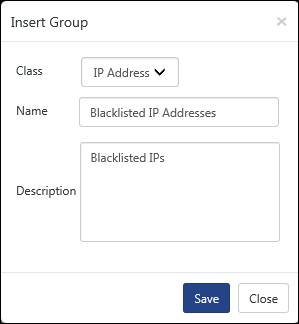
5. Select the required CLASS:, enter an appropriate NAME: and DESCRIPTION:.
6. Select the SAVE button.
Ex: To create a list of blacklisted IP addresses.
a. In CLASS: drop down select IP Address, enter NAME: as ‘BlackListed IP Addresses’.
A group is created under IP Address list.
You can view the created group in Active Watch List window.
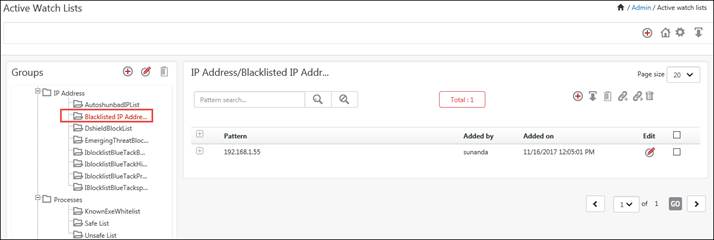
b. Select the Black Listed IP Addresses link.
You can further continue to edit the groups and perform necessary actions like import, link and move which are explained in forthcoming sections.
In a similar fashion you can create a list of processes, services, port no, Users, Domain, URL etc.
7. To add a new group, click the ![]() symbol in GROUPS pane and continue to add required groups for the necessary classes as explained above.
symbol in GROUPS pane and continue to add required groups for the necessary classes as explained above.
|
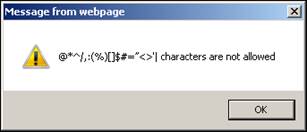
2 NOTE |
|
If you enter a group name with special characters then an error message displays. |
1. To edit a group in Groups pane, click Edit ![]() icon.
icon.
Group window displays.

2. Enter relevant data and then click the Update button.
To create a New Class,
· Click the add ![]() icon in the right hand corner.
icon in the right hand corner.
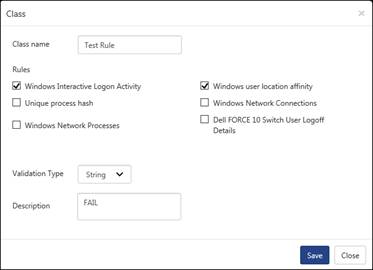
The Class window gets displayed.
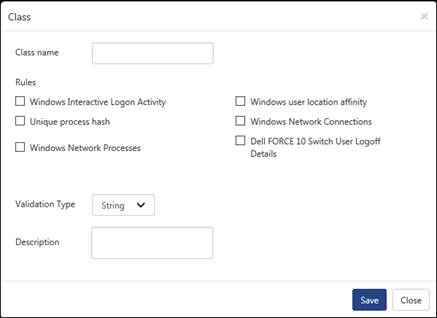
· Enter the Class name and select the Behavior Rule(s) checkbox that are to be mapped with the class.
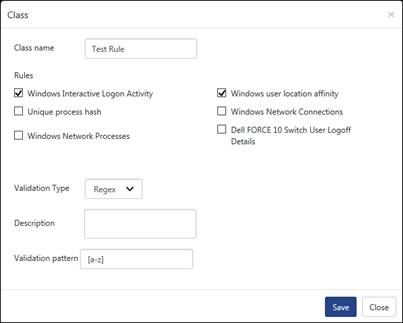
· Select the Validation Type from the dropdown list.
|
Field |
Description |
|
String |
A String can be selected. Ex: FAIL
|
|
Number |
A Number can be selected. Ex: 14505
|
|
Regex |
A Regular Expression can be selected. Ex: [a-z]
|
To edit or modify an existing class,
· Select the class and click the edit icon ![]() in the top right hand side corner.
in the top right hand side corner.
· The edit class window gets displayed.

· Make the changes required and click the Save button.
1. Select the required group in Groups pane.
Ex: Black Listed IP Addresses
2. To add a new pattern, select the ![]() symbol in the right pane.
symbol in the right pane.
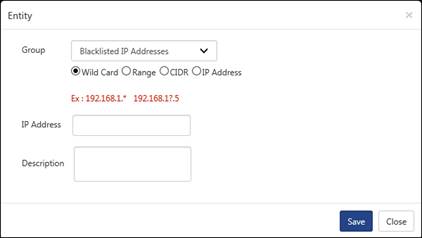
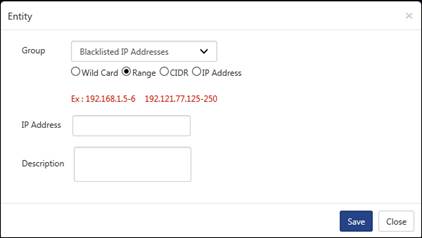
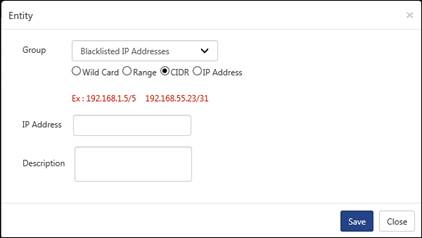
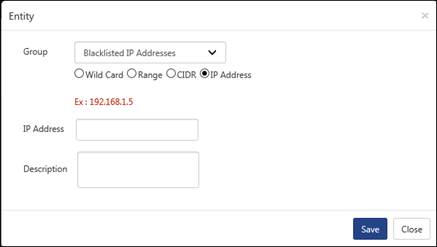
Entity window displays.
|
Field |
Description |
|
Wild Card |
A wild card entry can be entered. Ex: 13.34.34.*
|
|
Range |
A range of IP Addresses can be entered. Ex: 19.26.7.8-8
|
|
CIDR |
IP addresses can be entered in CIDR format. Ex: 12.18.1.4/10
|
|
IP Address |
A valid IP address can be entered. Ex: 168.63.138.84
|
3. Enter the IP Address: in the required pattern and add a necessary Description:.
4. Click the Save button.
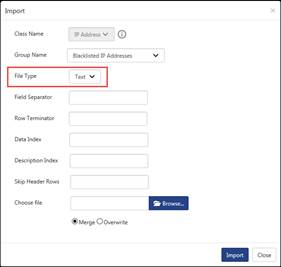
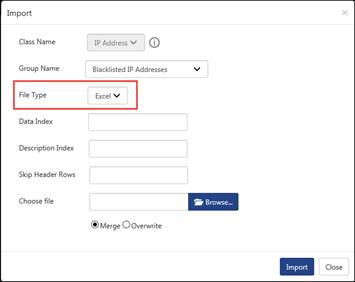
1. To import a list of IP Addresses, click the Import ![]() icon.
icon.
2. Select/enter correct values in the required fields. Click the Browse button and attach a Text/CSV/Excel file.
| Field |
Description |
|
|
Class Name |
The class name in which you wish to import data is selected already. |
|
|
Group Name |
Select the required group |
|
|
File Type |
Text/CSV |
Select the required File Type i.e. Text or CSV.
Click |
|
|
Excel |
Select File Type as Excel.
Click |
|
Field Separator |
Space ‘\s’, Tab ‘\t’, semi colon ‘;’, colon ‘:’, comma ‘,’ etc. NOTE: This option is not available in Excel File Type. |
|
|
Row terminator |
New line ‘\n’, Carriage Return ‘\r’ NOTE: This option is not available in Excel File Type. |
|
|
Data Index |
It is the columns that are been indexed. In Text/CSV File Type, you can enter only numbers. In Excel File Type, you can enter only alphabets. |
|
|
Description Index |
A valid number or Alphabet and this field is Optional. In Text/CSV File Type, you can enter only numbers. In Excel File Type, you can enter only alphabets. |
|
|
Skip Header Rows |
You can input a number. |
|
|
Choose file |
Click the Browse… button and select the file from local drive. |
|
|
Merge/ Overwrite |
You merge or overwrite an existing list. NOTE: If you click on merge, then the list will be merged with the existing one. If you click on overwrite then the previous list will be removed and the new list will be updated. |
|
3. Select the Import button.
The relevant data will be imported accordingly.
|
2 NOTE |
|
Duplicate entries are not imported. |
1. To delete a pattern, select the required pattern option.
Ex:
To delete IP address, check the correct option.
2. Click Delete ![]() icon.
icon.
A message displays requesting for confirmation to delete.
3. Click the OK button.
A successful message displays.
The relevant IP address is deleted from IP Address/Black Listed IP Addresses group.
|
2 NOTE |
|
The same applies to a group also. If you want to delete a group, then you have to first delete the list otherwise a warning message displays. |

1. To link a pattern to another group,
Ex:
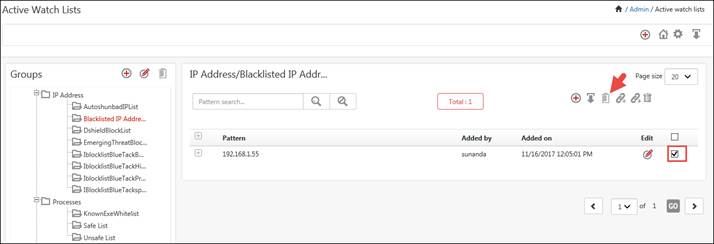
a. To link an IP address 103.20.193.92 from AutoshunbadIPList group to New Group, check the respective option and click the Link to group ![]() icon.
icon.

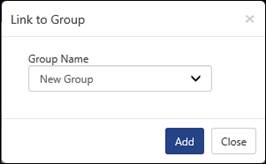
Link to Group window displays:
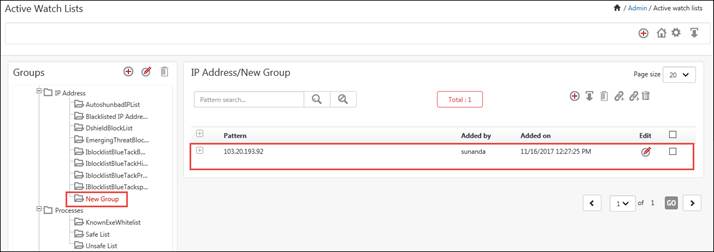
b. Select the Group Name, and then select the Add button.
The IP address 103.20.193.92 is successfully linked to New Group.
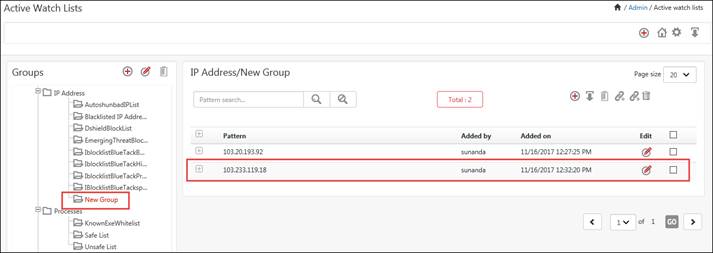
1. To move a pattern to another group,
Ex:
a. To move the IP address 103.233.119.18 from AutoshunbadIPList group to New Group, check the required option and, click Move to group ![]() icon.
icon.
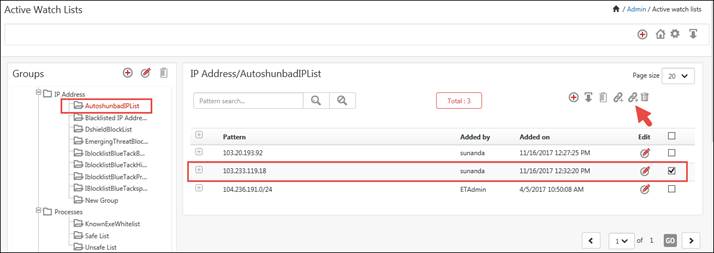
Move to group window displays.
b. Select the Group Name, and then select the Move button.
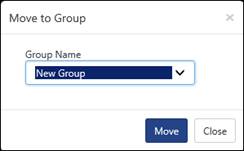
The IP address 103.233.119.18 is successfully moved to New Group.
To monitor the usage of IP addresses and processes, please refer Behavior -> IP Address Activity or Process Activity.
To learn more about the usage of entities in Active Watch List, command line usage etc, please refer Active Watch List and its Usage.
This feature will connect to any of the TAXII Server(s) to collect the Cyber Threat information to EventTracker.
To configure TAXII feeds, click the icon![]() .
.

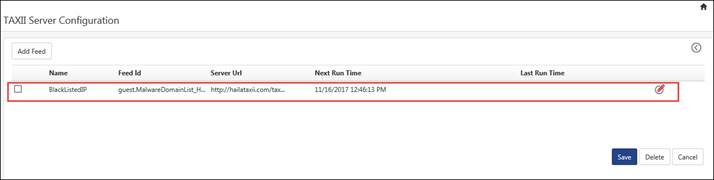
The TAXII server configuration page gets displayed. Click the Add Feed.

The Configuration page gets displayed. Enter the configuration details.
1. Name: Provide a User-friendly name to identify the TAXII feed.
Example: BlackListedIP
2. Feed Id: Feed Id/Collection Name available on TAXII server from which data needs to be fetched.
Example: guest.MalwareDomainList_Hostlist
3. Server URL: Complete TAXII server endpoint URL.
Example: http://hailataxii.com/taxii-discovery-service
4. Login Name: User name that is to be used for authenticating with the TAXII server.
5. Password: Password that is to be used for authenticating with the TAXII server.
6. Enable Proxy Server: To use proxy for internet connectivity. (If the organization’s internet connectivity is running with proxy connection).
7. Proxy Server URL: URL of the proxy server.
8. Login Name: User name that is to be used for authenticating with the Proxy server.
9. Password: Password that is to be used for authenticating with the Proxy server.
10. Enable two way SSL: To authenticate client for SSL using certificate.
11. Certificate file: Certificate file to be used for client side SSL authentication.
Example: G:\TAXIIServer\admin.p12
12. Password: Password for the client certificate file.
13. Ignore SSL errors: To ignore the SSL errors.
14. From date: By default, it will select the frequency of 24 hours and the current system time when the feed is added.
15. From time: System Current time (as explained above).
16. Poll frequency for TAXII server: This is the time interval used between each connection request to the TAXII server.
Below are the names of the watch list groups in which the user(s) wishes to collect the data. Default classes are IP Address, MD5, Domain, and URL.
Ø IP watch list
Ø MD5 watch list
Ø Domain watch list
Ø URL watch list

The added TAXII configuration gets displayed. Click Save.